Showing posts with label garden. Show all posts

Thursday, April 11, 2013

starting seeds in egg cartons

It's that time of year again! Time to play in the dirt! I'm not quite sure what it is, but there's something that I absolutely love about gardening - squishing the soil between my fingers (no, I don't wear gloves), watching for the tiny little seedlings to emerge, the leaves and flowers grow, then the tiny fruits and vegetables start to form... Plus, then you get delicious fresh fruits and vegetables from your own yard! Maybe it's just the magic of watching life change and grow. Whatever it is, I have been so excited this week about getting things ready for my garden!

This year, most of my gardening will have to be container gardening. So we bought a few planters, and I'm planning to steal borrow a few from my mom that she doesn't use.

Since it's still too cold to plant anything outside yet (stupid snow predicted next week), we started some seeds inside. Last year, I wrote a post about starting seeds in strawberry containers. Well this year, we decided to use egg cartons.


They've already sprouted! I'm so excited! And so is Jack. We read Eric Carle's The Tiny Seed in preschool, and then planted our seeds. He loooooved filling the cartons with the soil once he realized it was okay that he was getting all dirty! He also helps me water them every day and gets so excited when he sees a new one coming up. And he keeps insisting that they're going to grow giant flowers which he will give to his grandmas. Too cute.

So why egg cartons instead of strawberry containers? A few reasons:
1. We had egg cartons and didn't have strawberry containers
2. The strawberry containers work well as little greenhouses for seeds that need to stay warm, but we weren't worried about that this year with the seeds we were planting
3. The egg cartons are biodegradable so we could theoretically just cut them apart and plant them. Although if we do that, I'll be sure to score them first so the roots can get out more easily.


What you'll need:
Cardboard egg cartons
Seed starting soil (I used Black Gold seedling mix)
Seeds
Marker and/or pen
Scissors

1. Use the scissors to cut the lids off the egg cartons and to poke holes in the bottom of each well. (We actually used a pen to poke the holes so Jack could do it himself.)


2. Use the marker or pen to write on the outside of each what type of seed you'll be planting (unless it's just one kind). I just wrote the first letter - Z for zucchini, L for lettuce, etc.

3. Fill each well with the soil.

4. Follow the directions on the seed packets for planting depth, and plant your seeds! Water, place in a sunny location, and wait for the magic! And of course, continue watering as the soil dries out.


5. When the weather is warm enough (or your garden is ready) transplant the little seedlings to your garden! You'll want to make sure they've spent some time outdoors before transplanting so they've started acclimating. Then either gently squeeze the dirt and plant up and out of the carton; or cut the carton apart, slice some stripes vertically to allow the roots to grow more easily, and plant in the garden!

Happy gardening!


Thursday, May 10, 2012

gardening

Some of my craft projects have been put to the back burner lately because I've been spending more time out in the garden!  I've been trying to get everything planted now that the sun has been shining and it's not getting below freezing over night.  Unfortunately, my big belly and the ensuing back aches have limited my garden time... but over the past couple weeks I've gotten a fair amount planted, and it's starting to look good!
This was taken the first week of April - still rather dead looking

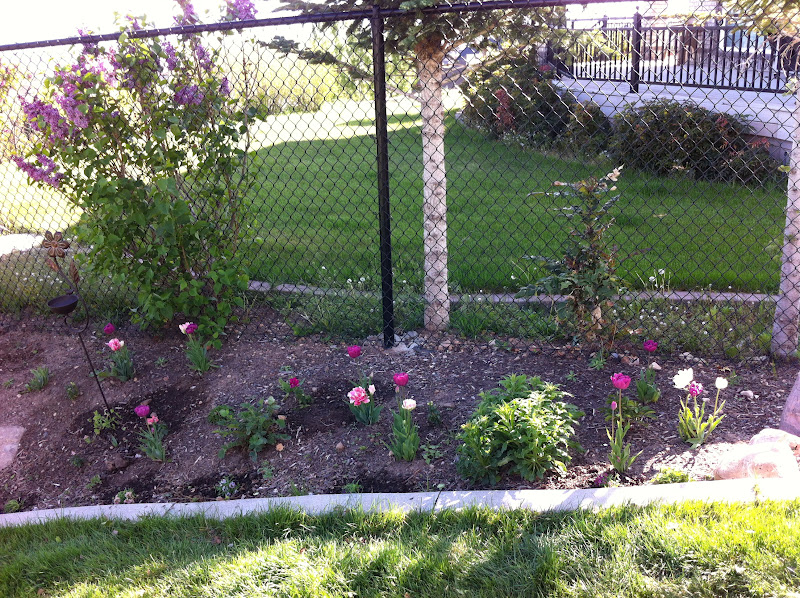
This was taken May 1.  So much more is growing!  I planted some new things, and lots of the plants from last year started coming back to life.  It looks even better now, just a week later - some of the flowers have started to blossom!

This is one of my favorite little bedding areas in the yard.  Some of the plants are coming back from last year, and lots of them are new and just starting to grow and fill in, like some gorgeous peonies (hopefully we'll actually get blossoms on it this summer).  And we're planting another lilac, some hollyhocks, and some other things here too.  By next year this area will be amazing!


I can't wait to start eating those delicious peas and juicy tomatoes and sweet watermelons.  That is definitely the best part about a vegetable garden!  Everything just tastes so much better!  Unfortunately I don't have any good pictures of the vegetable garden yet... I just find the flowers so much more photogenic!

But while I wait for all my fruits and vegetables, I get to enjoy some of the spring blossoms.

A beautiful pink double tulip


A red columbine in full bloom

Oh, I just love spring!

Now I should go actually finish up the new Bible story puppets I've been working on so I can share those with you too.

Wednesday, March 21, 2012

starting seeds for your garden

When I was a little girl and read "The Secret Garden" for the first time, it had a very deep impact on me, and that question, "Might I have a bit of earth to plant a garden?" has been somewhat of a quest for my life.  I love plants - flowers, vegetables, trees, fruits, everything.  Okay, maybe not weeds.  But even some of the weeds starting to pop up in my yard have cute little flowers on them!

Our very first blossom of the season - a crocus flower that I rescued from the snow yesterday


Needless to say, I absolutely LOVE spring!  It means I get to start working in my garden again, and the world turns green and beautiful again.  So even though there are still patches of snow in my yard right now, I'm getting ready.  Last week I started some seeds for some of the cool season vegetables that I can plant out in the garden probably next week.  I'm so excited!

So I wanted to share a super easy way to start some of your seeds inside to get them ready for the garden.

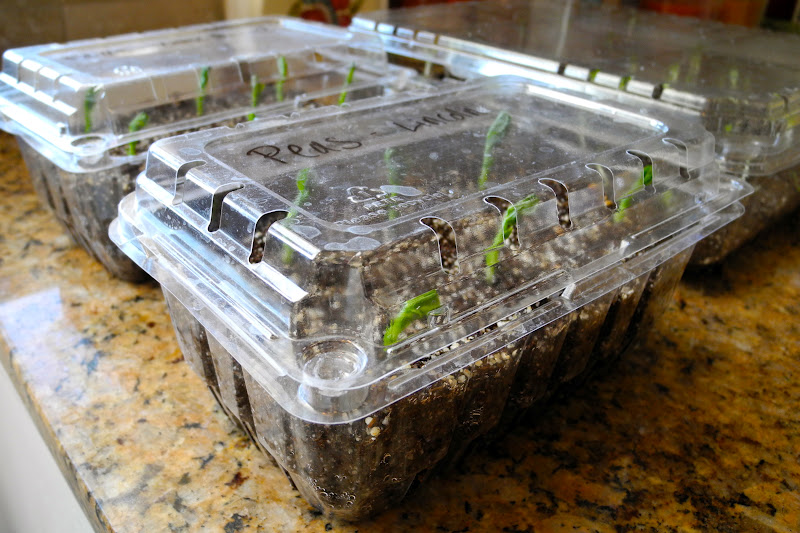
Plant them in plastic strawberry containers.


Make sure they're the ones that are a bitt taller - at least 3".  Just fill the bottom about 2/3 with a seed starting soil (not potting soil) and plant the seeds following the instructions on the package.  Since the bottom already has holes, the water drains easily.  The lid keeps a bit more moisture in to help the seeds germinate, and to keep prying little fingers out of the dirt.  Just set them somewhere where they get some indirect sunlight, make sure they stay moist, and wait for the magic!  


*Caution - don't keep them in too much direct sunlight (like in a window) because they'll heat up too much being indoors, and the seeds won't grow.


One other useful thing about starting your seeds in strawberry containers, is that if you use a bigger one, you can start several different types of seeds, and just write on the lid what you planted where!  This is my "salad" container - 5 different types of lettuce and some spinach.

This is also a fun, easy project for young kids to help you with, and to teach them about how plants grow and such.  They can so easily participate and watch as they sprout and grow.  My little guy loves to point at and "touch soft" the little seedlings.  (He also tries to grab handfuls of dirt sometimes, so I have to watch closely!)