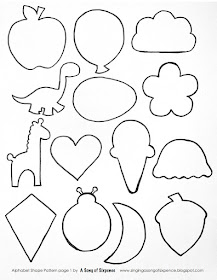
Once you've cut out all of your pattern pieces, you'll need to pick fabric for each of the letters and shapes. I tried to find fabric that kind of matched the shape for each letter - like the C and cloud are made from a sky blue fabric with white flecks.
This was actually my favorite part, going through all my old scraps and trying to find just the right fabric for each letter. Oh, and I did each letter and corresponding shape in the same fabric to help with the "matching game" aspect of it.
Cut out two squares for each letter and shape (front and back). Each will be approximately 2.5" square, though a few of the shapes are a little bigger so make sure you check.
My stack of scraps with their corresponding letters and shapes, almost ready to sew!
Then cut out squares from quilting batting in the same size.
My 52 batting squares, ready to be pinned to the fabric
Now you're ready to start assembling all of your letters and shapes!
Step 1: pin a piece of batting between two fabric squares. Make sure the fabric is facing right side out on the front and back.
Step 2: Place your pattern piece on the fabric and trace around it with a fabric marker (the kind that disappears on its own)
Ready to sew!
Step 3: Stitch along the outline you just traced. This takes a fair amount of patience (and occasional seam-ripping if you're like me and get impatient...) because you have to go pretty slow to get around all the detailed curves and turns.
Ta-da!
Step 4: Carefully cut around the seams to cut out your shape. Leave just a little bit of space beyond the stitching - don't cut too close or you might actually cut through the thread.
Step 5 (through like 500): Repeat for each letter and shape!
This is definitely a time consuming project, but I've enjoyed it, and I think (hope!) it's going to turn out really well.
Some of the letters and shapes I've finished already
Just a quick note - you might notice that the balloon, jellyfish, and kite all have ribbon sticking out of them. I pinned the ribbon between the layers before sewing, and then just carefully cut the layers separately where the ribbon was.
I still have to finish about 7 more letters, attach the magnets, and make the quiet book pages, but it's slowly getting there!


